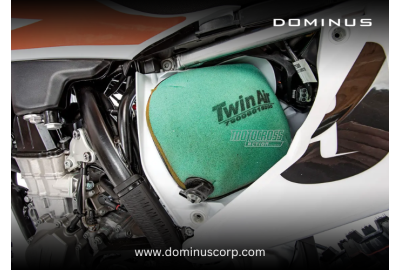
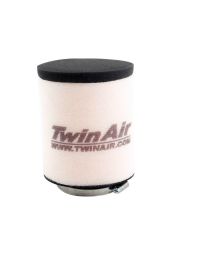
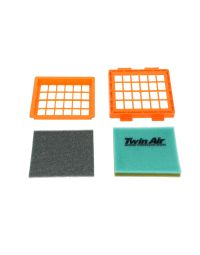
To properly clean and re-oil a Twin Air filter, remove the filter carefully without knocking debris into the airbox, wash with Twin Air PowerFlow cleaner or a mild foam-specific soap, rinse thoroughly, allow to dry completely, apply air filter oil for motorcycles evenly across the entire foam surface, let the oil penetrate for 15–30 minutes, then reinstall with a thin grease layer on the sealing rim. For Jacksonville riders in sandy conditions, this process should happen after every ride.
Why This Maintenance Task Matters More in Florida Than Almost Anywhere Else
Most dirt bike maintenance guides are written for average conditions. Jacksonville is not average conditions.
The silica sand that covers most of Northeast Florida's off-road riding areas — frm the trails around Ocala National Forest to the hardpack at Croom and the sandy roads near Palatka — is one of the most abrasive substances a dirt bike engine will encounter. Unlike mud, which tends to cake visibly on the outside of a filter and clearly signals the need for cleaning, fine Florida silica passes through a compromised filter without any obvious warning.
What happens next is invisible and expensive. Fine particles enter the intake, reach the combustion chamber, and gradually score the cylinder wall, wear the piston rings, and accelerate bearing wear. The damage is cumulative and appears as a repair bill, not as a warning light.
Your Twin Air filter is the only barrier between Jacksonville's silica sand and your engine internals. How you clean and re-oil it determines how well that barrier functions.
What You Need Before You Start
Gathering everything before beginning makes the process faster and reduces the chance of skipping steps. Here is what an experienced Jacksonville rider keeps on the bench for filter maintenance:
Cleaning supplies:
-
Twin Air PowerFlow Filter Cleaner or equivalent foam-specific cleaner
-
A plastic container or bucket large enough to submerge the filter
-
Clean running water or a garden hose
-
A soft brush (an old toothbrush works) for the airbox
Oiling supplies:
-
Twin Air Filter Oil or equivalent motorcycle air cleaner oil — foam-specific, not petroleum-based
-
Clean latex or nitrile gloves
-
Clean paper towels or lint-free cloth
Reassembly supplies:
-
Fresh grease or petroleum jelly for the sealing rim (Vaseline works)
-
Optional: Twin Air airbox sealing foam if the existing seal shows wear
Step-by-Step: The Complete Twin Air Filter Cleaning Process
Step 1 — Remove the Filter Carefully
This step gets rushed more than any other — and rushing it costs you. The goal is to remove the filter without dislodging any accumulated debris frm the outer foam surface into the airbox below.
Open the airbox carefully. Before touching the filter, look at the outer foam surface. If there is significant sand or dust build-up, hold the filter in position and tap it gently inward before pulling — the debris falls forward, not backward into the airbox.
Lift the filter out in a single controlled motion. Do not shake it, do not flip it upside down over the airbox.
While the filter is out, take thirty seconds to inspect the inside of the airbox with a clean rag. Any debris inside the airbox means contamination has already entered the system — inspect the intake boot for debris before proceeding.
Step 2 — Inspect Before Washing
Before washing, inspect the filter carefully. Look for:
-
Tears or holes in either the inner or outer foam layer
-
Areas where the two foam layers have separated
-
Sections of foam that remain compressed and do not spring back when pressed
-
Foam that has become brittle, cracked, or discolored frm heat
A filter with any of these conditions should be replaced, not cleaned. Washing a structurally compromised filter and re-oiling it gives you the false confidence of a filter that looks maintained but cannot do its job. In Florida's sandy conditions, this distinction matters.
If the filter passes inspection, proceed.
Step 3 — Apply Filter Cleaner
Place the filter in your container. Apply Twin Air PowerFlow cleaner — or your chosen foam-specific cleaner — generously across the entire outer and inner surface. Work the cleaner into the foam by squeezing gently. The goal is to saturate the foam enough that the cleaner can break down the old filter oil and trapped particles.
Allow the cleaner to penetrate for three to five minutes. Do not skip the penetration time — especially after Florida riding sessions where old filter oil has mixed with fine silica. The cleaner needs time to work before rinsing.
What not to use: Diesel fuel, gasoline, petroleum solvents, and harsh degreasers all degrade foam chemistry over time. They may look like they clean effectively, but they compromise the foam structure with repeated use. Stick with products designed for foam air filters.
Step 4 — Rinse Thoroughly
Rinse the filter under running water or with a gentle hose stream. The direction matters: rinse frm the inside out, which pushes debris out the same way it entered rather than deeper into the foam.
Squeeze the filter gently during rinsing to help dislodge trapped particles. Continue rinsing until the water running through the foam runs clear and carries no visible color frm the cleaner or debris.
Critical: Never wring or twist the foam. The internal structure of both foam layers depends on its three-dimensional integrity. Wringing tears the foam cells and creates channels where particles pass through unfiltered.
Step 5 — Dry Completely
This step is where impatient riders create problems. A damp filter installed back in the airbox traps moisture between the foam layers, accelerates foam degradation, and prevents the new filter oil frm bonding properly to the foam surface.
For Jacksonville riders who want to ride the same afternoon they cleaned their filter: place the filter in a warm, dry location with good air circulation. Avoid direct sunlight for extended periods — UV exposure over time degrades foam. Never use a hair dryer or compressed air to accelerate drying — both damage foam structure.
In Florida's humidity, allow a minimum of two to three hours in a warm environment. Overnight drying is ideal if your schedule allows it.
The filter is ready when it feels completely dry throughout — not just dry on the surface. Squeeze the inner foam layer and check for any residual moisture.
Step 6 — Apply Filter Oil Correctly
This is the step most often done incorrectly — either too little oil, too much oil, or uneven coverage.
Put on your gloves first. Air filter oil for motorcycles is tacky and difficult to remove frm skin without solvent.
Apply motorcycle air cleaner oil in a consistent stream around the entire outer foam surface. Work the oil into the foam by massaging it through both layers with your fingers, ensuring the oil reaches the inner foam. Pay particular attention to the sealing edge area — the rim of the filter that contacts the airbox — where coverage gaps are most costly.
The filter should look uniformly orange or red (the typical color of foam filter oil) with no dry patches visible anywhere on the surface. If you see grey or natural foam color anywhere, that area needs more oil.
Avoid pooling: If oil is visibly pooling and not penetrating the foam, you have applied too much. Excess oil can migrate toward the intake during operation. The foam should be saturated — not dripping.
Step 7 — Allow Oil to Penetrate
Set the oiled filter aside for 15 to 30 minutes. This penetration period allows the oil to fully work through the foam's three-dimensional pore structure rather than sitting on the surface.
After penetration, do a final inspection. Hold the filter up to a light source and look through both foam layers. The oil should be visible throughout. No dry spots. No excessive pooling.
If you find dry spots, apply a small amount of additional oil to those specific areas and allow another ten minutes.
Step 8 — Prepare the Airbox and Reinstall
Before reinstalling the filter, apply a thin, even layer of grease or petroleum jelly to the airbox sealing rim — the contact surface where the filter seats against the airbox. This grease serves two purposes: it ensures a complete contact seal with no air gaps, and it makes future filter removal easier.
Seat the filter carefully and confirm it is fully seated around the entire rim. Any gap at this sealing edge allows unfiltered air — and Florida's silica sand — to bypass the filter entirely, making the entire cleaning process pointless.
Close the airbox securely. Check that all latches or screws are properly fastened.
The Complete Maintenance Schedule for Jacksonville Riders
Regular air filter maintenance helps keep your dirt bike performing at its best. For sandy trails (Ocala, Croom, Palatka), inspect the filter after every ride and clean and re-oil it every 1–2 rides. On mixed terrain or enduro trails, inspect after every ride and service it every 2–3 rides. For motocross tracks, inspect after each session and clean every 2–3 sessions. In wet, muddy, or dusty conditions, clean and re-oil the filter after every ride. If your bike will be stored for more than 30 days, inspect and service the filter before storage and again before riding.
Common Mistakes Jacksonville Riders Make
Using the wrong cleaner: Gasoline, diesel, and generic degreasers are common substitutes when the correct product runs out. One or two uses may not cause visible damage, but repeated use with incompatible solvents degrades foam chemistry and shortens filter life significantly.
Installing before fully dry: The most common reason oil does not bond correctly to foam. A filter that smells clean and feels damp is not ready. Moisture trapped in the foam creates the conditions for accelerated degradation.
Skipping the sealing rim grease: A filter that is not completely sealed at the airbox rim allows bypass air. In Florida's sandy conditions, even a small gap over a two-hour trail ride allows enough fine silica into the intake to cause damage over time.
Reusing a structurally damaged filter: A filter with tears or separated layers cannot be repaired with cleaning and re-oiling. The structural damage creates permanent bypass channels. Replace it.
Over-oiling then installing immediately: Excess oil that has not penetrated the foam can migrate toward the intake. The 15–30 minute penetration period exists for this reason.
Twin Air Fuel Filter: A Related Maintenance Item
While doing air filter maintenance is a good time to check the twin air fuel filter as well — particularly on carbureted dirt bikes where fuel contamination is a more direct concern. Fuel filters should be inspected for discoloration, clogging, or visible contamination. Replace annually or at the manufacturer's recommended interval, whichever comes first. A clogged twin air fuel filter restricts fuel flow in ways that can mimic carburetor problems and lead to misdiagnosis.
FAQ: Twin Air Filter Cleaning and Re-Oiling
Q: How often should I clean my Twin Air filter in Jacksonville's conditions?
A: After every ride in sandy conditions — no exceptions. Northeast Florida's silica sand is fine enough to pass through a compromised or overloaded filter without visible warning. Professional riders in sandy environments clean after every session. For recreational riders, every one to two rides in sandy conditions is the minimum. If you ride in particularly dusty or muddy conditions, clean after every single ride regardless of how short the session was.
Q: Can I use motor oil instead of specific air filter oil for motorcycles?
A: No. Motor oil has the wrong viscosity for foam filter application and does not have the tacky surface properties that allow foam filter oil to capture particles effectively. Motor oil also does not bond to foam the same way — it migrates more readily, which creates oil contamination risk toward the intake. Always use air filter oil for motorcycles or motorcycle air cleaner oil specifically formulated for foam filter applications.
Q: How do I know if my Twin Air filter needs replacing rather than just cleaning?
A: Four things to check during every cleaning: tears or holes in either foam layer, separated foam layers at the seam, foam sections that remain compressed and do not spring back, and foam that has become brittle or discolored. Any of these conditions means replacement — not just a deeper clean. In Florida's abrasive conditions, inspect critically at every cleaning session rather than assuming a filter is good because it was replaced recently.
Q: What happens if I install the filter before it is completely dry?
A: The new filter oil will not bond correctly to damp foam. Moisture trapped between the foam layers prevents proper oil penetration and creates conditions for accelerated foam degradation over subsequent riding and cleaning cycles. If you are in a hurry, place the filter in a warm, dry location with good airflow and test for dryness by squeezing the inner foam layer before proceeding to the oiling step.
Q: Where can I buy Twin Air filters and air filter oil in Jacksonville?
A: Dominus Corporation supplies Twin Air filters, air filter oil for motorcycles, and motorcycle air cleaner oil with direct shipping to Jacksonville and throughout Florida. Visit dominuscorp.com or call 800-749-2890 for rider support in selecting the correct Twin Air filter for your specific make and model and confirming compatible filter oil options.
Conclusion: The Right Process Protects the Engine
Cleaning and re-oiling a Twin Air filter correctly is not complicated. But each step in the process exists for a specific reason — and skipping or rushing any of them compromises the result in ways that are not immediately visible but become expensive over time.
For Jacksonville riders dealing with Northeast Florida's fine silica sand, the filter maintenance protocol is not optional background maintenance. It is the primary line of engine protection. The correct air filter oil for motorcycles, applied to a fully dry filter after complete and thorough cleaning, creates a filtration barrier that allows your engine to breathe freely while capturing the particles that would otherwise end your season early.
Do it right. Do it consistently. Your engine will run longer, your repair bills will be lower, and you will have more riding days — which is the point of all of this in the first place.
Ready to build or upgrade your bike?
Visit DominusCorp.com
Explore trusted brands like Twin Air, TMV, Renthal, Braking, and Polisport
Ride with confidence—supported by people who ride, race, and caref
Address: 2615 Port Industrial Dr, Unit 401, Jacksonville, FL, 32226, United States
Telephone: 800-749-2890
E-mail: sales@dominuscorp.com
At Dominus Corporation, we are committed to providing premium products, outstanding customer service, and a seamless shopping experience. Join us in elevating your riding experience with the best powersports products in the industry.
Dominus Corporation—Where Quality Meets Performance!